Showing posts with label homeschooling. Show all posts

Wednesday, October 16, 2013

Complementary Color Monsters

Following our foray into the world of spectrums, Joey is still enamored with color. So, we've been savoring some basic concepts of color theory in our little part of the world.

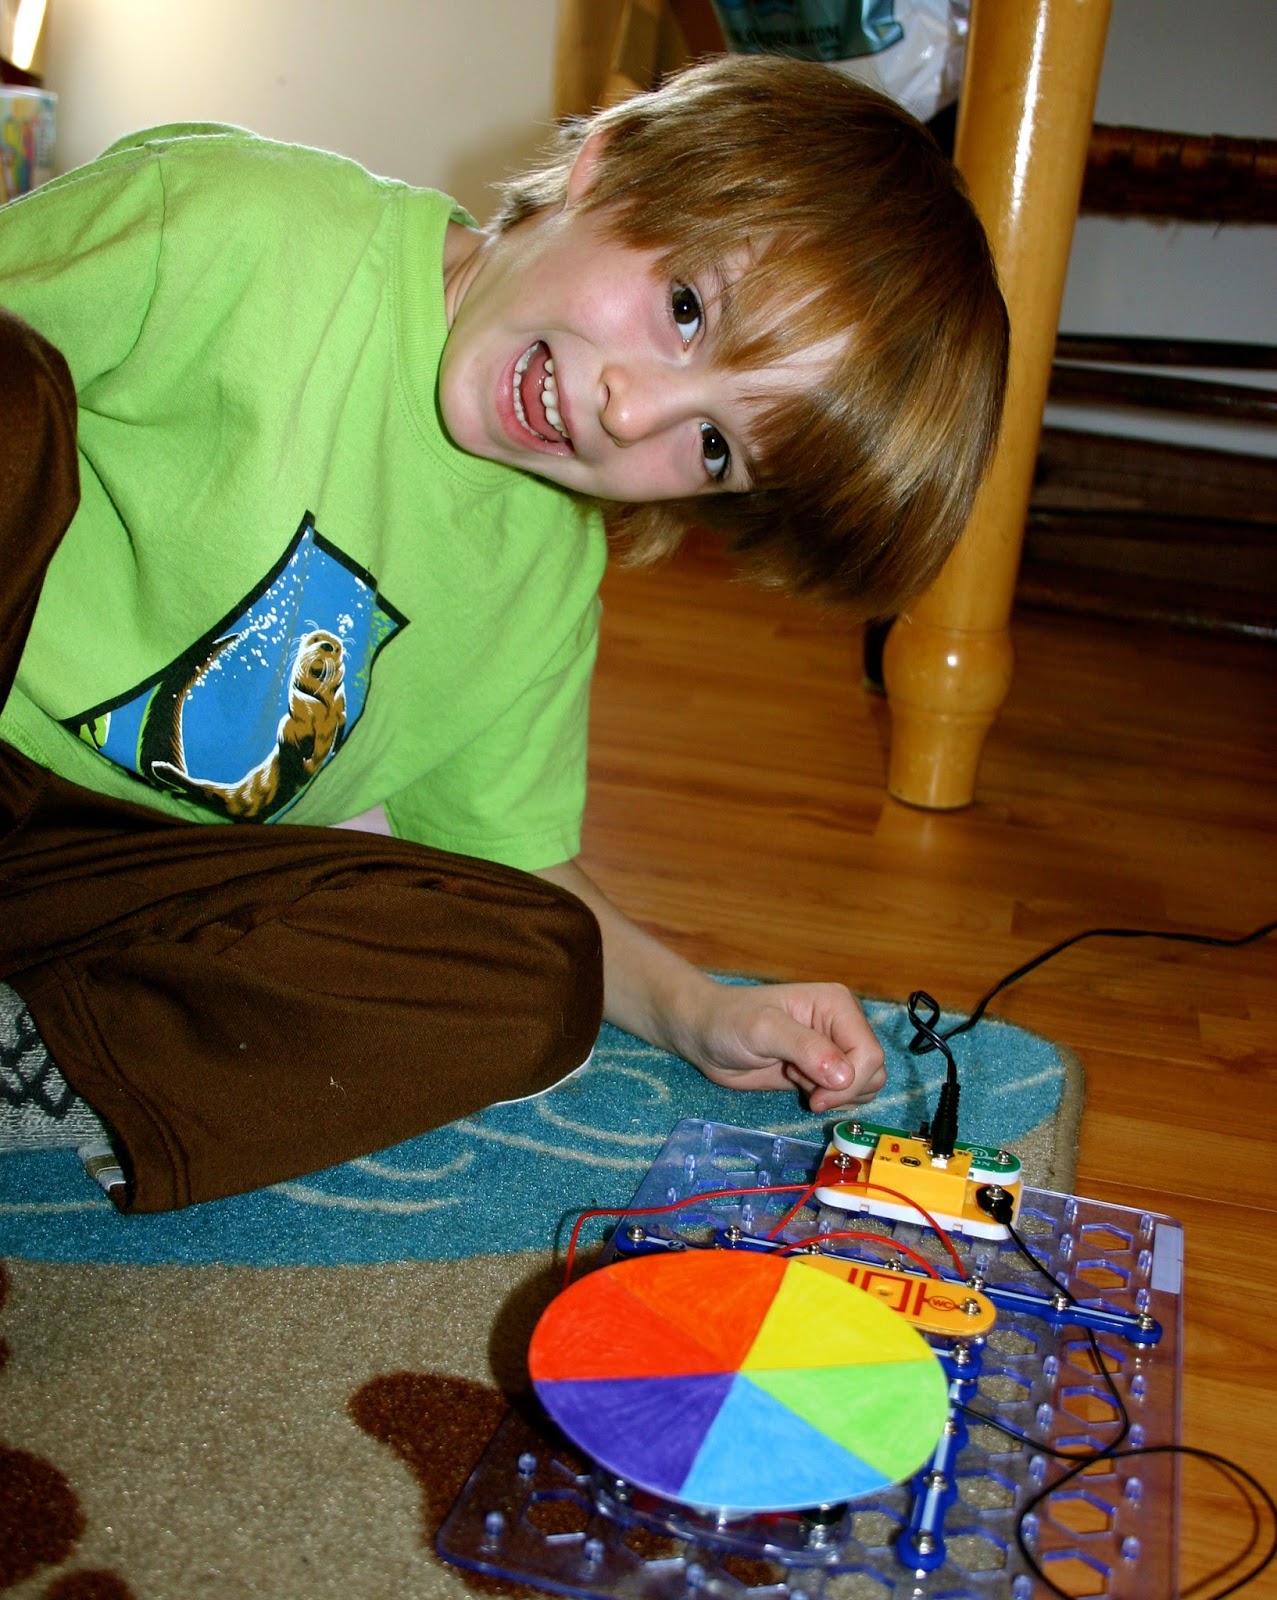
Joey showing the color wheel - Ezra, all smiles.  senk 2013
As you know from reading a previous post ("Try, try again..."), we explored the primary and secondary colors during our look at how a rainbow is formed, which also involved Newton's study of spectrums and the color wheel. Joey created three different magnets - on each, he smeared paints on notecards to discover which primary colors produced which secondary colors. His delightful oohs and aahs were well worth the experiment. Seeing firsthand that red and blue combine to make violet in pigments was a joy not only for him, but for me too as an observer of Joey's experiment.

Mr. Blue and Mrs. Orange Monster.  senk 2013
We made good use of recycled materials and donated craft supplies (thank you, Grandma and JoEtta!) to create quite a parade of monsters, most recently. But, these are monsters with a meaning. The challenge? Joey and Ezra had to help me create monsters that display complementary color pairs. We studied four main ones - three based on Newton's color wheel (red - green, orange - blue, and yellow - violet) and white - black. The end result was an array of Complementary Color Monsters, constructed from toilet paper rolls and paints and myriad add-ons (glitter, goggly eyes, etc), that remind my little tykes of a basic color theory concept.

Although I did not get into the more complex ideas of subtractive vs. additive complementary colors, for an older audience, you can easily adapt and add to a unit on basic color theory. I found Ian Sidaway's "Color Mixing Bible" to be particularly helpful in providing illustrations for my Kindergartener and toddler. This book incorporates different mediums in art, too, which is great for showing how color looks with different textures resulting from various artist's tools.

Joey & Ezra, good playmates.  senk 2013
But another fabulous component to the Complementary Color Monsters exploration was the concept of complementary, itself. According to Merriam-Webster, "complementary" means: "completing something else or making it better; going together well; working well together." The very idea of complementary colors includes enhancing the color opposite on the color wheel. Thus, this lesson also includes concepts of ethics and relational matters. The boys saw the monsters as being complementary to one another in terms of being good "playmates" or being kind to one another. And, we were able to talk about how the boys could be complementary playmates, too - using kind words and actions toward one another.

There are so many ways to apply color theory in our day to day adventures. Hopefully you'll find some, too, and add a comment on how complementary colors enhanced your day.

Complementary Color Monsters.  senk 2013


Wednesday, September 4, 2013

Try, try again...

From Noah to Descartes to Newton, rainbows have fascinated people for years. And no less do they fascinate Joey and Ezra. During our prior-to-school's-start brainstorming sessions, when the boys revealed some of the topics they wanted to cover during their school exploration times (like volcanoes and bugs), the rainbow was second on the list. But, how do you cover such a complex topic of physics with such young children?

Recently, a line from Walter Lewin's For the Love of Physics has been resonating in my mind. He says, "What counts, I found, is not what you cover, but what you uncover" (2011:2). He continues, "Uncovering the laws of physics and making them see through the equations,... demonstrates the process of discovery, with all its newness and excitement..." His observations apply to any subject at hand. It's the passion, the discovery, and the applicable meaning that we harbor in our hearts during learning. And for young children, that means hands-on and up-close.

Obviously, I employ manipulatives in my teaching. The more experiments and activities (beyond worksheets and the ordinary), the better. But, any scientist-at-heart will tell you that experiments and trial-and-error go hand-in-hand. So, in order to cover rainbows, I turned to some great books* with experiments on light, prisms, and refraction. Some of these were major failures (yes, homeschoolers have those), but that's where the best parts of learning come in: perseverance and creativity. We worked together to brainstorm ways to make our experiments work and tried again, and even again. That's where the successes occurred (yes, homeschoolers have those, too).

Joey w/ his snap circuit color wheel.  senk 2013
We began our exploration on how rainbows are made with bending light. I wanted Joey to see how light bends, because that's how it happens inside a raindrop. So, we followed Science Lab: The Ultimate Science Pack and completed "Laboratory 6: Which Way Does Light Go?" This experiment worked really well and Joey had a splendid time using multiple mirrors and using his imagination to explore bending light. The next obvious step was to experiment with a prism and allow sunlight to create a spectrum on the floor, on the wall, on our hands. The boys were delighted to look for spectrums and Joey wanted to draw one. So, I introduced him to Roy G Biv, that scintillating character many of us learned about in Art Class. We combined paints so Joey could see how secondary colors were created from primary colors (here, I'm referring to the pigment-based primaries: red, blue, and yellow; and yes, we also explored the primary colors of light - red, blue, and green - too); and, we talked about Newton and explored Newton's color wheel. It took three attempts before we finally got the colors to vanish into the all-inclusive white, indicative of sunlight.

A closer view of his set-up.  senk 2013
With "Laboratory 5: Vanishing Colors" of Science Lab, we focused on the concept of white light being a combination of many different colors. But, this experiment was based on creating a top that would spin to blur the spectrum into white. While it's good in theory, in actuality, we could not spin the top fast enough for white to result. So, I spearheaded another experiment from The Optics Book: Fun Experiments with Light, Vision & Color by Levine & Johnstone (1998). The idea was to create a Rainbow Wheel that twisted on string between your fingers. Another good idea in theory, but we just couldn't twist the wheel fast enough to see white from the spectrum. So, what could we do? Then, the Eureka moment came: Joey's snap circuit set! Using the red rotating wheel, Joey set up a circuit that would allow the rotator to turn really fast. I taped our color wheel to the rotator; Joey placed it just right; then, he flipped the switch. The rotating wheel was spinning so quickly we easily saw a spectrum of color zip into white light. How dazzling!

Of course, Joey was thrilled and so excited. And, while I was thrilled the experiment finally worked, I was more excited that Joey saw how (even over the course of a few days) it pays to persevere. I know there are going to be moments of frustration, exhaustion, and confusion in homeschooling; however, I also know that we never have those feelings without their opposites. So, let's toss a little courage into the mix and see what happens.


* Examples of books we read or used for these lessons (nota bene: this is just a sample; there are other competent resources - this is by no means an exhaustive list):

Arvetis, Chris & Carole Palmer, "What Is a Rainbow?" A Just Ask Book. 1983.

Barton, Chris. The Day-Glo Brothers: The True Story of Bob and Joe Switzer's Bright Ideas and Brand-New Colors. Watertown: Charlesbridge, 2009.

Burnie, David, "Light." Dorling Kindersley Eyewitness Books. 1992, pp. 28-33.

Carle, Eric. Hello, Red Fox. 2001.

Levine, Shar & Leslie Johnstone. The Optics Book: Fun Experiments with Light, Vision & Color. New York: Sterling Publishing Company, Inc, 1998.

Lewin, Walter. For the Love of Physics: From the End of the Rainbow to the Edge of Time - A Journey Through the Wonders of Physics. New York: Free Press, 2011.

Science Universe Series, 1984."Sight, Light and Color," pp. 18-19, 26-27, 34-35, 47.

Stewart, Melissa. Why Do We See Rainbows? New York: Marshall Cavendish, 2009.

Tuesday, August 27, 2013

What are you doing?

Roof tiles fell and shattered to the floor. Lightning brooded in the plume of Mt. Vesuvius. And people remaining in Pompeii on August 24, 79 AD, fled as far as they could before the pyroclastic flows and ashfall finalized the fate of the Roman city. It was no better in Herculaneum and several other small towns near the base of the volcano. Museum Victoria in Australia provides a fabulous recreation of the experience of this natural disaster. Both Joey and Ezra were amazed by the visual effects. We all ducked when the pyroclastic flows proceeded on the screen!

Joey and Ezra pouring vinegar into the volcano.
Joey's first few weeks of homeschooling have included learning about volcanoes. He loves science and seeks for its inclusion in every day of the school week. As I mentioned in the previous post, A priceless picture, we investigated how pressure and heat are important to a volcanic eruption. Joey also got to simulate his own volcanic eruptions, from stratovolcanoes to shield volcanoes, via Discovery Kids' Volcano Explorer. And, smiles erupted as much as vinegar and baking soda in our paper mache volcano, complete with their model dinosaur toys.

In addition to how a volcano erupts, Joey was also curious as to where volcanoes are found. A globe, atlas, and maps were vital in showing Joey the location of The Ring of Fire, Italy, Indonesia, as well as myriad other site names associated with volcanoes. We read "Volcanoes" by Franklyn Mansfield Branley (1985), watched "Fire & Ice: Hawaii & Alaska" made by Adventures in America's Western Parks series, and perused geography books for pictures of volcanoes. And, for volcanoes associated with Virginia, I sifted through a website with tons of information, especially on Mole Hill in Rockingham County and Trimble Knob in Highland County. We discovered that the columnar basalt we always visit near Limberlost Trail in Shenandoah National Park are from ancient volcanic activity in the Blue Ridge Mountains (myriad other trails also provide glimpses at volcanic rock). It's always great when the boys can have a tangible experience related to their learning - so a hike was a must!

To round out Joey's first project exploration, we investigated the volcanic eruptions of Krakatau and Anak Krakatau. Again, Joey got to see where in Indonesia the volcanoes are (or in Krakatau's case, was) located, learn how other natural disasters (like earthquakes, tsunamis, etc) are often associated with volcanic eruptions (especially when they're really powerful and near water), and - throughout the entire few weeks - has applied terminology relevant to volcanoes (like lava, magma, crater, vent, et cetera). During play time, Joey took a break to draw in one of (actually my) journals.

"What are you doing?" I asked, a bit bewildered at his lines at first.

"Oh, I'm drawing Vesuvius about to erupt." Joey replied nonchalantly. 

"See, here's a theater with lots of seating. And, here's a house." Joey pointed out the buildings sprawled about the base of a volcano looming in the background.

"Oh, and here's the eruption!" Joey used his pen in powerful strokes to show the violent upheaval that would have resulted from a volcanic eruption.

As Joey's mother and his homeschooling teacher, it's extraordinary to see him connect his learning to everyday life. I have an unprecedented position to mold his education in a way that not only enhances his interests, but also builds on his knowledge base by incorporating life experiences that connect his learning in ways sometimes not noticed by the often disjointed reality of public education. Our family can maximize on the learning and on the fun - together! How does your family have fun learning? Share in the comments section.


Monday, August 19, 2013

A priceless picture

Joey (5 yrs) on his first day of school.
Opening envelops and reading words of encouragement on the cards we received from many family members and friends, Joey delighted in the love and support that surrounded his first day (and week) of Kindergarten. Although we did some basic assessment the first week of school, such as ascertaining his knowledge-base of the alphabet, numbers, writing his name, blending phonemes, rhyming, etc, Joey (and Ezra) had tons of fun amidst the learning.

No, the first day of school did not entail my son, loaded with a backpack, standing at the end of the sidewalk and waiting for a big yellow bus to appear on the horizon. No, the Pledge of Allegiance was not the first recitation of the day (or even a part of his day). No, my son did not experience the climate of a large-class environment.

Instead, he prepared for the day (even wearing a beaded necklace that he threaded over the weekend), helped clean up after breakfast, and then started the day with our usual morning worship service. He recited the Lord's Prayer with me, did a scavenger hunt to discover his Bible verse for the week, and then learned about the importance of volcanoes in creating the atmosphere for our planet in the early stages of Earth's history. Over the course of the first week, we compared the creation story with the geological time scale; and surmised from this highly-constroversial topic that God created the earth and all that is in it - regardless of how scientists and theologians hash it out. We made a paper-mache volcano (thanks to an Amazon packing box, Elmer's glue, shreds of Northern Virginia Daily, a recycled Stonyfield yogurt tub, and an empty spice container), painted it, and plan to "erupt" it as close to August 24th as possible (yes, I'm a classical archaeologist at heart). Joey learned that heat and pressure are two important necessities for a volcanic eruption to occur. We used the "Fountains of Fun" activity in Laboratory 13 of the "Science Lab: The Ultimate Science Pack Laboratory Manual" (1997:28). The experiment requires filling an empty plastic bottle 2/3 with water, shoving in a drinking straw, sealing the opening around the straw with modeling clay, and then blowing air into the bottle through the straw. The boys were delighted to see the jettison of water result when they moved their lips from the straw. This was a good way to illustrate pressure's importance in a volcanic eruption. To illustrate heat, I plan to melt red wax in a water-filled beaker - but, that's week two.

Ezra, the robot - up close and personal.
Amidst the science fun, the boys reviewed numbers, played Sequence Letters, learned the concept of one less and one more, and became more familiar with a globe, magnets, levers, and a balance. Joey is enjoying the beginnings of German, piano, and has art-infused into each day. But, there is still so much time for them just to have creative play. For example, during the second day of school, the boys claimed a larger Amazon packing box for the basis of a robot costume they wanted to make. I helped them by cutting out holes with an exact-o knife, but otherwise, the ideas were their own. They each had fun wearing the costume around the house and decorating the box with creative shapes and colors.

I had no idea what to expect for the first week. I definitely did not expect quite so much creative play and demand for learning. The boys are so inquisitive - and, I have to try to keep up with their yearning to know more. It was an exhausting week. And, I felt my public-school-learned self pushing against the more liberal way of homeschooled learning with less rules and more freedom. The best advice I received from an inspiring friend was to have patience with myself. Perhaps I have much more to learn than my boys do!

Tuesday, June 11, 2013

Encouraging Acts of Kindness

Ezra gathering field daisies in The Shenandoah Valley, VA.  senk 2013
Joey and Ezra love to gather wildflowers and garden flowers, strawberries, sugar snap peas, and even eggs (from the chicken coop). But, they gather them for a purpose - usually to take to Grandmommy. 

Children have a natural propensity toward compassion. They love to create gifts for others and are quick to add hugs and kisses to the list, as well. Encouraging acts of kindness is an important part of not only homeschooling, but also life.

In our household, Joey and Ezra will find miscellaneous toys, wrap them in recycled newsprint, and then give them to one another. It's adorable to see them at such play. I keep bits of ribbon, wrappings, or bags that we got from previous gifts for them to use in their giving play. They use scraps of paper for notes; write "I love you" cards to friends and family; and make random phone calls to loved ones just to see how they are doing. I keep a mailable envelop for extended family that lives out-of-state and mail it when we've gathered a collection of their compassionate memorabilia. And, Joey is starting to type "I love you" e-mails to family with such addresses.

There are myriad other ways for children to demonstrate compassion. Perhaps you could make baked goods to take to neighbors or work at a food pantry together. Make a meal for someone in need of some tender, loving care and teach your child the power of prayer. Each morning and evening, our family has prayer time together and it's so powerful to hear them pray for friends by name. Another important skill that shows kindness is teaching children how to say a hearty "thank you" to those that bless their lives. 

How do your children show kindness? Are they gentle with animals and even bugs; do they show care for the environment? Do they offer a helping hand (such as a back scratch when it's needed) or want to make things for others? Share ways your family promotes compassion, too.

Thursday, May 23, 2013

As simple as it sounds

Ezra learning how to brush his teeth.
As simple as it sounds, there are basic life skills we all need to learn how to do. Of course, this may vary culturally and geographically, but ultimately we have to learn personal responsibility. By separating children from the vary act of living while they're learning, we are doing a disservice to their education.

Consider this: how many public schools have time for flossing and brushing teeth after lunch? How many public schools allow children to help make their lunch? How many public schools encourage children to take an active role in cleaning or gardening or other necessary chores? How many public schools integrate daily living practices with the child's education?

Perhaps some public (and private) schools can tackle these challenges; however, a majority do not. Instead of seeing meal preparation or cleaning or other life routines as someone else's job, it's important for every member of a learning community to realize their personal responsibility in helping out. Neither messes nor meals nor memories are made alone - there is a process to each of them that requires more than ourselves for positive results. How important that children learn this as part of their education!

An Internet search will reveal myriad sources for knowing appropriate tasks well-suited to a child's age. But, common sense and observation will help with this - consider a child's dexterity, attention span, and cognitive development. A routine can be very useful to encouraging good living habits. For example, cleaning up after a meal is a great transition to play time or a learning activity or reading before a nap. Working together with a smile always helps. When children see that what they are doing will help Mommy or Daddy do something fun with them afterwards, they are more prone to help, too. Or, consider a treat for the family if you work on a task (particularly an unpleasant one) together. 

Another helpful tip: let the child choose the task to complete. Some life events cannot be delegated: brushing and flossing will eventually fall solely on the child for him or herself, for example. Other life events can be shared: cleaning dishes or laundry, setting and clearing the table for mealtimes, etc. There are a plethora of resources from lists to charts to apps that can help assign weekly and monthly chores - rotating to create a fair slate of tasks for each individual in the family. But, the most important thing to remember is to make it fun and to do it together.

Tuesday, April 23, 2013

Resources for outdoor adventures

Russell with a heart-shaped treat. senk 2013
Earth Day should really be a part of every day. That is what I'm teaching my boys.

Messages of savoring nature's beauty, appreciating the hard work of gardening, and interacting with the real world out there are mingled throughout their homeschooling curriculum. But, it's more than just a curriculum; it's a way of life. Learning is as much a part of living as living is of learning.

No matter where you live, there are ample opportunities to enjoy (often free) activities that help your children get into the great outdoors. In the Shenandoah Valley, our family frequents Shenandoah National Park - hiking along paths that start along Skyline Drive's slow meander along the mountain crest. An annual pass pays for itself by the second or third trip, so we make that an anniversary gift each August. In addition to state or national parks, consider visiting town parks (which often splash natural colors and textures even amid cityscapes) or zoos or vineyards or living museums or farm markets, etc. For Earth Day, our family ventured to Stanley, VA, and helped to plant grapevines at Wisteria Vineyard. We relished the family time traveling over Massanutten Mountain. As enjoyable as the (free) event was, our family also learned (together) many valuable lessons: how to properly plant a grafted grapevine (which can be applied to any grafted plant), the importance of working together (many hands really do lighten the workload), how to follow directions and observe carefully, etc. By the end of the morning, Joey could properly stake a vine and Ezra was a master at gently placing grapevines into prepared holes. And, did I mention, the learning was free!

Joey & Ezra at Wisteria Vineyard.
senk 2013
It can be difficult to find those few good resources that yield information on fun outdoor events in your area.  But, be diligent - ask friends and family, surf the Internet, and ask proprietors of the places you frequent. Where I live, a great resource for upcoming events and places to visit is "The Shenandoah Valley of Virginia and West Virginia." Click on the "More events" link in the "Things to Do" box on the bottom lefthand side of the webpage. Then, peruse the plethora of opportunities which are listed in order of date. If you're visiting the Shenandoah Valley, this is a great place to start discovering events or locales in an area you may enjoy. 

Often, some of the most exciting outdoor excursions are unexpected ones. Just be open to new learning experiences - especially ones you can do as a family. Not only do you create meaningful memories, but you weave more closely the threads of learning, living, and loving.

Wednesday, April 3, 2013

Putting an "i" in culture

Culture refers to an exposure to intellectual training, fine arts, and a study of the humanities. It also includes the beliefs, customs, values, and way of life of people all around the world. Of course, I also think of the culture grown on a petri dish in the lab for scientific study. And, this time of year, I consider all the tillage happening.

Regardless, incorporating concepts of culture is an integral part of any homeschooling activity. This could include historical, anthropological, or archaeological studies of various peoples, as much as an appreciation for the arts. But, doing so requires some common sense and care. There are inappropriate ways to experience culture - especially when there are potentially negative consequences (e.g. nefarious rites - just Google human sacrifices to get an idea of what I mean). Careful and respectful consideration of culture, though, will provide your child with a well-rounded understanding of the beautiful variety among people.

One way I incorporate cultural practices into my children's lives is to expose them to ways other people celebrate certain holidays or traditions, while still being true to our own religious understandings. At Easter time, for example, the boys and I make lambropsomo, which is a flavorful bread loaf decorated with a twined Byzantine cross and topped with naturally-dyed eggs. We put our own delicate touches into the result by adding alpha and omega symbols, a vine of grape leaves and clusters, etc. Ezra was particularly enamored with creating his own bread roll - carefully rolling bits of vine for his baked good. Russell spearheaded dying eggs by cooking beets and soaking hard-boiled eggs into the colorful water until they glowed dark pink. The final result was quite delightful (and tasty, too).

There are so many ways to explore the wealth of meaning in the world. Find a way to incorporate culture into your family's life and share the results in the comments section. Maybe you practice the Greek custom of giving gifts on your birthday (in lieu of or addition to receiving them). Perhaps the Chinese practice of cleaning your home on New Year's Day is something you do. Or, then again, your family might find meaning in creating your own traditions (e.g. a long-ago friend's parents hid Easter baskets filled with goodies in unlikely places; to find the baskets, they had to follow wandering threads like Theseus in the labyrinth). However you decide to put culture into your family or you into the culture, have fun and share a passion for learning with your child.

Thursday, March 7, 2013

Eggs-tra! Eggs-tra! Read all about it!

Last Lenten season, our family was caring for 42 fertile chicken eggs, which hatched into fuzzy chicks over Easter weekend. We had borrowed an incubator that gently rocked the eggs and bathed them in warmth. The last days of their incubation, the chicks' ovular homes rested calmly on the wiry base. As sharp bills cracked the white casings, Joey and Ezra shrieked with delight. Once hatched, dried, and energetic, the chicks provided endless fun for the boys to view, but more importantly, the entire experience gave them firsthand understanding of a chicken's life cycle. Today, some of those chickens are in the freezer (ready to provide our family with nourishment), a few found a home with others interested in raising chickens, yet others have free range over the yard and their own chicken condo in exchange for eggs, and one (Chanticleer, of course) protects the rest.

Although incubating your own fertile eggs may not be what you had in mind for a fun family activity this Spring, there are lots of alternatives. The key is to find something that inspires your family to learn as much as to have fun learning. Two such ideas are: the bounceable egg and all-natural dyes for boiled eggs.

Using a clear glass, an egg, and white vinegar, you can create a bounceable egg. Carefully, place the egg into the glass and cover the egg with vinegar. After allowing the resultant chemical reaction to work for a full day, you can remove the egg and gingerly bounce it. I carefully wiped the film from the outer membrane before letting my boys play with it. You'll notice I also made them bounce the egg in a container, so that when it did break (hey, I have energetic boys after all!), it was a contained mess. This science experiment led to tons of questions and the boys were eager do it again. Maybe your family could experiment with different types of eggs to see if various bird species have differing thicknesses to the outer membranes? Or, maybe your family could work out the chemical formula and consider what other liquids would work for this experiment? There are lots of other ideas - brainstorm how you can use this experiment in your homeschooling adventures and list them in the comments section.


Another grand idea is to make your own dyes for Easter eggs. Research the types of herbs and vegetables that create those glamorous colors you love to splash onto hard-boiled eggs and try them out. For example, beets are great for pinks, and boiled ground turmeric for yellow. For a unique idea, arrange wild violet heads and sprigs of dill, sprinkles of turmeric, and other favorite color-producing bits around a clean raw egg. Wrap the decorated egg with either yellow- or red-onion skins (the former produces a yellowish tint; the latter, a lovely bluish), and then swaddle with a square of simple white cloth, which you hold in place with rubber bands. Once you've mummified several eggs, place them in boiling water and cook for about 12 minutes. Cool them with cold water and carefully unwrap for a dazzling display. Experiment with the recipes and post your favorite results in the comments.

Marvelous egg experiments are sure to delight your children. I know I was just as excited by the results as my boys were. Ah - life-long learning is egg-cellent! I do hope you agree.

Monday, February 18, 2013

Gather. Stir. Knead. Play!

Joey makes a tadpole to show part of a frog's life cycle.
Children loves to manipulate dough. They squish it through tubes or cut it into shapes. Perhaps they're chefs creating an exquisite feast or ceramicists crafting perfect coils for a new hand built pot or a naturalist recreating a leaf of animal to study. Whatever they pretend, it is always fun to have some sort of dough with which to play.

Any Internet search will reveal a plethora of play dough options. Here's one that I use; it's so good that I only need to make it once a year, if that often.
Save containers to store the dough.
Family gave Ezra Play-doh, whose
containers I saved for my own dough.

Ingredients:
1 envelop of flavored drink mix
1 1/4 cups of all-purpose flour
1/4 cup of salt
1 cup of boiling water
1 tablespoon of oil

Directions:
1. Gather the ingredients
2. Stir together the ingredients. Let cool until you can handle the dough.
2. Knead the dough until it's smooth.
3. Play! Make sure to store in a tightly sealed container so that you can enjoy it for a while!

Take a moment to share some of your child's favorite shapes to make with this dough. Or, perhaps your little one made a geological landform, a model of an ancient Roman house, or some other accompaniment to your lessons - if so, share the idea!

Friday, February 1, 2013

Variety among sea stars

Sea stars come in more varieties than I realized. They are radially symmetrical, but not limited in terms of number of legs, coloration, or even patterning. Some have the anticipated 5-legs; others, myriad; and should a leg or two or more be in the process of rejuvenation, those legs could be various lengths or thicknesses. Such variety! And, such beauty. 
Joey and Ezra were enamored with sea creatures during a recent visit to Long Beach, California. On Leo Carrillo State Beach, the boys discovered a sea anemone and starfish in little tidal pools near where the waves splashed against large rocks. Aquarium of the Pacific proffered first-hand views of starfish suction-cupped to aquarium glass, as well as opportunities to touch the rough skin of these prismatic sea gems in touching stations.

So, when we returned home, the boys and I decided to further expand our knowledge of Pacific Ocean creatures, such as starfish, jellyfish, sea otters, etc. I pulled activities from children's magazines, puzzle books, and my own imagination to craft fun activities to enhance my sons' understanding of the amazing animals we find on Earth. Big Backyard, now known as Ranger Rick, Jr, a magazine with animal-related activities and information for children aged 4-7, contained "Mystery Animal?" starring the sea star in their June/July 2012 issue. Following the story, the magazine provided two activities: "Name Game," in which children could try to match a picture with a name, and "Sea Star Pretzels," which provided a recipe to create your sea star treats. Joey and Ezra experimented with pretzel designs and came up with some fabulous sea star shapes. The Dover Little Activity Books series gave inspiration for other activities in "Learning About Sea Animals" and "Sea Life Follow-the-Dots." The boys also traced star-shaped cookie cutters to create drawings of starfish, which they mailed as a thank-you to the Aquarium and as a notecard to a well-loved family member.

The ideas are endless, though, and can easily be tweaked and recreated for your own at-home lessons! Perhaps your children could design postcards, donning sea stars, to use throughout the year for family birthdays, anniversaries, or encouraging notes? Create an Under the Sea play, write a haiku, invent a new game incorporating sea creatures, incorporate habitat and research what it would be like for humans to live as starfish do (what would be the similarities and differences; how would mankind have to adapt?), etc. Take a moment and share what you might do with starfish as a learning unit.

What I like most about our sea creature lessons is that they remind me of what it is to be a teacher. Each child has a unique perspective to life. Just as the variety of starfish, so too is there great variety from child to child. But, it's more than skin deep. Looking at the dreams and interests harbored within each dear heart, a teacher cannot help but feel the weight of caringly orchestrating the education of the child. So, amid the chaos and energy, remember the delicate pearl that lies within each little one you teach.

Sunday, October 28, 2012

H is for Hike

Each week we devote ourselves to a different letter and use the senses to explore that letter. We discover tangible objects throughout our house that start with the noted letter, take a trip to see or experience something with that letter, eat food that starts with the letter, etc. Several weeks ago, we learned the letter "H." After reading some children's books devoted to H, as well as my go-to books: "Dr. Seuss's ABCs" and "My Spiritual Alphabet Book," the boys had to sort objects into two different piles. One pile was devoted to objects starting with G, for reviewing; the other, with H. The objects mingled in a bag and one by one, Joey or Ezra delved elbow-deep into the bag to claim an object. Although Joey was the main sorter, Ezra managed to help, too. In the G pile, glasses, a giraffe, glue, and a game were placed. The H pile grew to include: a heart, a helicopter, a hotpad, and a hat.

Later in the week, we took a hike on one of the myriad trails along Skyline Drive. Getting the boys in nature any time is important, but connecting letters with experiences is a great way to making the alphabet real for them - so H for hike made an impact. Not only were the boys enamored with the Limber Lost trail we took, but they were even excited to point out items along the way that could be identified with the letters they knew. Rounding a bend in the path, we came upon the short remains of a chopped tree trunk.

"Look!" Ezra pointed with great exuberance and in his little boy accent, "a heart!"

"Ezra, heart starts with the letter H," Joey said in his big brother way, as if he had just centered new meaning in the galaxy (which in some ways he had for himself; and which is also apt as we have been reading Madeleine L'Engle - so his mannerism seemed to come from the pages of her books).

"Oh!" said Ezra, "okay!"  Then, he proceeded to run ahead to the next interesting spot on the trail.

Besides a heart-shaped tree trunk, the boys found a hole, which was the escape route of a chipmunk they were frantically stalking on the hike. They also found some non-H bits of nature that were just as fascinating, and all along the trail, Joey finger-drew his name in the fine gravel of the trail. Letters abounded.

And, they can abound for you, too. If you decide to run through the alphabet, consider cooking foods that start with or can shape the letter for the week. Plan activities with that letter in mind. Perhaps hopscotch or horseback riding would round out your H week. Read books that start with the letter H or have main characters whose names start with H. Listen to music by bands or composers with your proclaimed letter. Look for youtube videos that incorporate the letter, too (such as a good video of juggling for J - I would highly recommend Juggling Charlie at http://www.youtube.com/watch?v=vfJM1I9hFRs). Or, browse books at the library or the Internet for good images of a non-native animal that begins with your letter. We researched hot air balloons recently, because Joey wanted to know how hot air balloons descended (more on that later). We found a great book at the local library, a Curious George book that included a hot air balloon, and saw some videos on youtube to help with this research. 

Learning should be a life experience and it should be based on student interest. If you can make a child's learning relative, fun, engaging, and contextual - as well as child-focused and not teacher-focused - then, you're looking at a great recipe for encouraging life long learners. And, more importantly, life long learners that engage the community around them and work toward making a difference in the lives of others.

So, happy learning - and have fun!  And, do share the fun ways you engage a letter in your home.

Monday, October 8, 2012

The allure of shadow


Shadows are fascinating! I still recall the first time Joey and then Ezra discovered the play of shadow and light on the floor - they were mesmerized. Children's books, such as "Bear Shadow" by Frank Asch and a segment from Ezra Jack Keats' "Whistle for Willie," display imaginative play with one's shadow at its best (although, I don't think I will give my little boys nails and a hammer for unguided play any time soon).

Recently, we explored the shadow in another way. Since we do not own a television, but are fortunate enough to own a projector, we used the latter technology to simulate the sun's rays in a dark room. Joey and Ezra grabbed object after object, put them in the blue light's way, and watched the resulting shadows as they danced across the wall. Some objects were transparent or translucent, like a water glass, and seemed to sparkle even on the screen. Other objects were opaque, blocking the light and casting black forms, like Joey and the trumpet. With each ebony-etched pattern, we oohed and aahed.

Although my boys are too young to understand certain concepts, like Shadow Blister Effect or Rayleigh scattering, as well as analyzing the proportionality of the cotangent of the sun's elevation angle and the length of a shadow, these are concepts they can learn one day. And, it will all begin with the childlike delight at flashing shadows across a screen.

Monday, September 17, 2012

Where do you see ABCs?

The letter C found in nature.
Over the past year, as Joey has become more and more familiar with his alphabet, the letters have become more predominant in the world around him.  On our nature walks, he sees an L-shaped rock or Ys running down tree bark.  Sometimes I will ask him if he sees any letters in the landscape, but most of the time, he looks for them on his own. 
A is for acorn.


As Joey more formally learns the ABCs, I have tried to use activities to help him point out letters in a way beyond pencil and paper.  Long yarn pieces and cooked spaghetti noodles make great tools for shaping the curves and lines of letters.  With fun music playing, we dance and use our bodies to shape more than just Y, M, C, and A.  We match objects with initial sounds, not with pencil and paper, but with real candles, combs, cars, and carrots, which are intermixed with a shoe, a button, a pencil, and a star.  Or, if we want to highlight other letters, we choose objects that allow us to do that.  Other times, I display four objects and four small letter cards, then ask Joey to put the letter with the correct object based on the initial sound.  

Right now Joey picks out letters, but before too long, he'll be able to manipulate the letters into words or even phrases.  A lunchtime bowl of alphabet soup is perfect for assessing what he knows, because it allows him to pick out and name letters.  Older children could practice spelling words or creating phrases with letters swimming in a cup of alphabet soup.  Often, a sales flyer or outdated magazine provides a means for circling letters with a marker or cutting out letters for pasting on a collage.  The possibilities really are endless and benefit from a pot of creative simmering.

Stars indicate the letter A.
One activity Joey enjoys uses recyclables and stickers: two things he loves!  Rummaging through the recycling bins, I pick out three or four items for him to use in finding the letter of the day.  For example, when we are talking about A, I give Joey a yogurt top, an aluminum foil holder, and a cookie box.  He uses the stickers to place on all the As, upper and lower case, he can find.  I am always amazed how well he does and he usually runs out of stickers before he can star every letter he finds!  Meanwhile, Ezra (not to be excluded from any activity Joey does) uses stickers to create a Dali-inspired bit of artwork.


Joey finding A on some recyclables.

In what ways does the alphabet creep up in your home learning environment?

Friday, September 14, 2012

A truly rollable cookie recipe for learning ABCs

Clay is a great manipulative for coiling into shapes like letters and numbers, as much as it is a means for creating functional pottery.  The smooth, soft feel of clay fascinates most people, who are not squeamish with getting a bit dirty, and especially children.  Joey and Ezra are quite fond of folding their hands around a blob of turning clay on a potter's wheel; shoving carving tools into a patted ball of clay so as to create a porcupine or pincushion or other needly object; sponging water rings through the clay-covered wheel as it turns and splatters. 

Joey forming a cup at the potter's wheel.
Both boys thoroughly enjoy playing with miscellaneous doughs inside the house as much as in the pottery studio.  But, it is difficult to find a yummy cookie dough that is as much fun to make and manipulate as it is to eat once it's baked.  So, after studying several recipes from Greek cookbooks (who doesn't love "The Complete Greek Cookbook" by Theresa Karas Yianilos), the Internet (which largely provides a plethora of options for roll-out sugar cookies and tons on inedible baker's clay or play-dough), and a mass-letter producing recipe from a Good Apple Teaching Resource book entitled "Rainy Day Fun," in which their ABC "Mud" Cookies (1987:22) inspire more attention, I decided to make my own recipe for Chocolate Alphabet Cookies.

Chocolate is a much loved treat in our household; so, too, are finding letters in everyday items.  Of course, my Alphabet Cookies provide a good helping of all-natural cocoa, in addition to some healthier alternatives for baked cookies.  But, an even more admirable characteristic of this dough, is that it really is a dough.  Perhaps if your preferred method is rolling out and stamping shapes from cookie dough, you could still do that, but the elasticity present in the unbaked state of Chocolate Alphabet Cookies provides the manipulative factor that allows my boys to roll coils that then become alphabet letters and numbers.  Their hands (and a baking sheet or four) are the only tools needed, once the dough is made.  No cookie cutters (and, not everyone owns an array of alphabetic cookie cutters, anyway), no rolling pins, no flour or powdered sugar to cover the surface, just the soft and pliable wad of cookie dough and two imaginative boys (and their mommy and daddy).

Joey with his JOEY chocolate ABC cookies.
Joey has become a master of forming J - O - E - Y in the clay-inspired cookie dough. Ezra needs more help, but he can already pick out some of the letters.  We can create their names, the entire alphabet, and still have enough dough leftover to make fun shapes and objects, like stars, snakes, spirals, geometric shapes, et cetera.  The recipe even lends itself well to variations and your imaginative additions: try frosting the baked shapes and donning them with sprinkles, use a flavor other than chocolate as the base, push white chocolate or peanut butter chips into the shapes before they bake, use coconut shavings or walnuts or myriad other additives to create textures or interest (both in taste and sight) to your letters and shapes.  The ideas really are endless, but at the core of it is a fun dough recipe you can use as a manipulative to teach your children the alphabet, numbers, basic shapes, and a variety of rudimentary knowledge (e.g. older children could roll out important dates and create an image that represents the important event they need to know, such as 79 AD and an image of Herculaneum covered in mud at the base of Mt. Vesuvius or an array of elephants crossing over the Pyrenees into Italy for 218 BC during the Second Punic War when Hannibal crossed the Alps to attack the Romans).

Ezra displays his EZRA chocolate ABC cookies.
And, without further ado, the recipe...

CHOCOLATE ALPHABET COOKIES

Ingredients:
2/3 cup whole wheat flour
2 1/3 cups all purpose flour
1/4 cup milled flax seed
1/4 cup ground almonds
1/2 cup unsweetened cocoa powder
1 teaspoon cinnamon
1/2 teaspoon salt
dash of nutmeg
2 hard-cooked egg yolks (see step 1)
1/2 cup brown sugar
1/4 cup honey
1/4 cup cold unsalted butter
1/4 cup coconut oil
1/4 cup extra virgin olive oil
2 large eggs
1 teaspoon pure vanilla extract

Directions:
1.  After covering two eggs with water in a small saucepan, bring them to a gently rolling boil.  Continue boiling for 10 minutes.  Turn the stove's burner off and let set for 2 minutes.  Then, drain the water and spray the eggs with cold water for a minute or so.  Then peel the eggs and separate the yolks from the whites.  Let your children eat the whites while you, after acquiring a small bowl and a fork, mix the egg yolks into the brown sugar.  Set aside.
Dry ingredients mixed with hard yolks, sugar, & butter.
2.  In a large bowl, add the flours, flax seed, ground almonds, cocoa powder, cinnamon, salt, and nutmeg.  Stir together.  Then, cut in the butter until it is well incorporated.
3.  Add the oils, sugar with yolk, honey, eggs, and vanilla extract, mixing together well.
4.  Knead the ingredients together, starting out in the bowl, then turning the dough onto a clean tabletop.
5.  Preheat oven to 350 degrees.
6.  Once the dough is formed, pinch some off, roll into a coil, and shape accordingly.  Nota bene: it is easier to shape the letter or number on the baking sheet rather than transferring from the tabletop to the sheet and especially so if the shape is particularly large.  Coils should be about the size of your little finger, unless you want giant shapes.
Shapes before baking.
Wet ingredients ready.
7.  At this point, you can add any extras to the designs, such as chocolate or peanut butter chips, various nuts or candies, shredded coconut, etc.  Or you can wait until they are baked and decorate with frosting and other additives.
8.  Bake in a preheated oven for about 10 minutes (adjusting bake time based on thickness of coils).  Then, cool.  You can store these in an air-tight container or zipper bag, preferably in the refrigerator for longer lasting use. 

Once your Chocolate Alphabet Cookies are cool, use them to spell words, practice visualizing the alphabet song, or just to see what letters your child knows.  If you made upper and lower case versions of the letters, play a scrambled matching game to see if your child can match the big and little letters.  If you made numbers, use them for addition, subtraction, multiplication tables, a number line, or a wide array of mathematic considerations.  Let your imagination soar and introduce your cookies into aspects of education you may never before have considered!  And, please do share how your family uses this recipe.